RECIPES

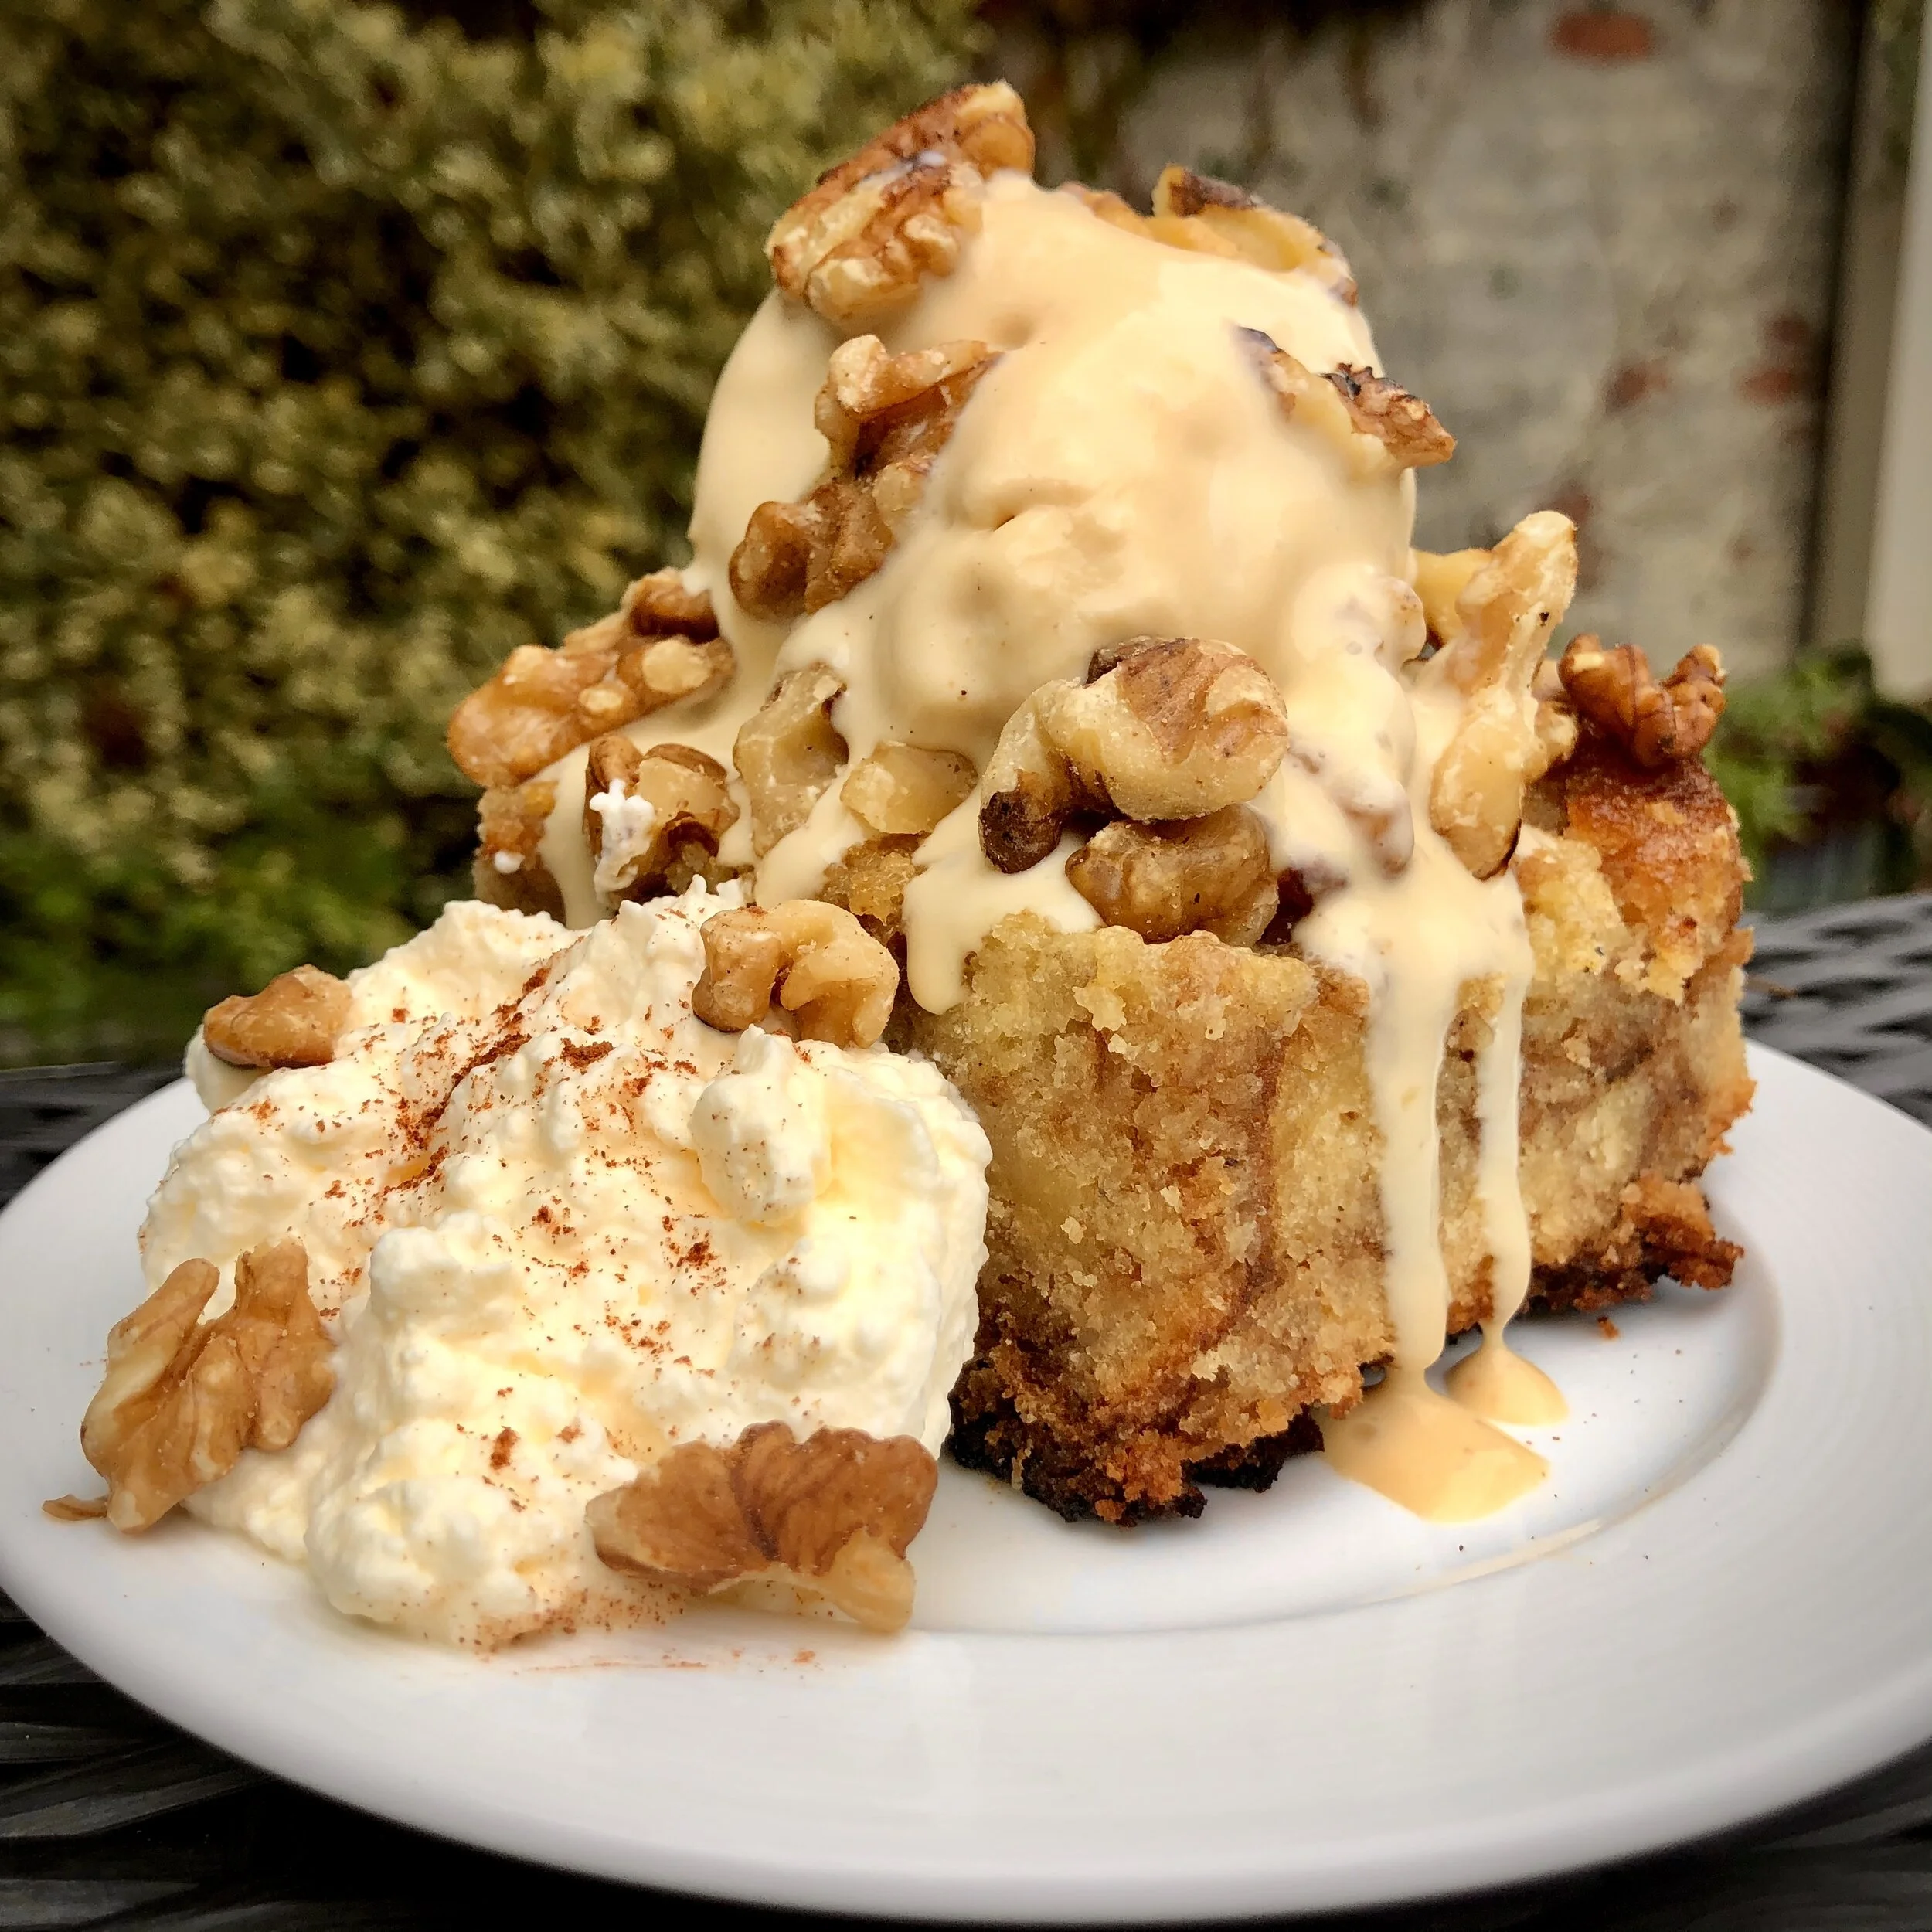
Profiterole with Chocolate Coffee Sauce

If there’s two things I love in this world, it’s food and musical theater. Recently, I had the opportunity to publish a piece that tackled both - 3 historic foods to make for the Hamilton premiere on Disney+! This profiterole recipe was developed for that article, and is a modern take on the dessert that was served “In The Room Where It Happened.” For the pastry puffs, I turned to my grandmother’s recipe - cream puffs were her favorite dessert. Then I modernized an early recipe (handwritten by Thomas Jefferson!) for simple vanilla ice cream. To top it off, hot fudge sauce with a hint of coffee - a nod to the beverage that kept Hamilton writing like he was ‘running out of time.’ Please enjoy this dessert as you “raise a glass to freedom” this July 4th weekend!

IMG_7816.jpeg

PROFITEROLES WITH CHOCOLATE COFFEE SAUCE

Prep time: 1 hour (plus overnight chill for custard)

Serves: 6

INGREDIENTS:

Pâte à choux: 

½ cup water 

½ cup flour 

¼ cup butter 

2 eggs

Vanilla ice cream: 

1 qt heavy whipping cream 

1/2 cup sugar 

3 large egg yolks 

1 vanilla bean, halved with beans scraped  

Chocolate coffee sauce: 

1/2 pint heavy cream 

1/2 cup sugar 

2 tbsp butter

6 oz bittersweet chocolate, like Scharffen Berger 

2 tbsp cocoa powder, like Valhrona 

2 tbsp espresso powder 

½ tsp vanilla extract 

Pinch of salt 

DIRECTIONS:

For the ice cream: 

  • In a large saucepan over medium-low heat, combine cream, ½ the sugar, and vanilla bean (including the pod). Stir to combine and bring the mixture just to a boil.  

  • In a metal bowl, whisk together the eggs yolks with the remaining sugar until the mixture thickens and pales. 

  • Pour 1/3 of the hot cream mixture into the eggs yolks, whisking constantly. Then add another ⅓ of the hot cream mixture, continue whisking.  Return this mixture to the saucepan and continue whisking over low heat until the mixture thickens and coats the back of a spoon. Do not allow the mixture to boil.  

  • Remove from heat and let cool to room temperature, then at least 2 hours or overnight. 

  • Strain through a fine mesh strainer, and then freeze according to ice cream freezer/maker instructions. 

For the sauce: 

  • In medium saucepan over medium-low heat, combine heavy cream, butter, sugar and salt. Bring to a simmer and whisk in chocolate. 

  • When chocolate has melted, add cocoa and espresso powder and whisk until no lumps remain. Remove from heat and stir in vanilla. Serve immediately or refrigerate and reheat before serving.   

For the pâte à choux: 

  • Combine butter and water in saucepan and bring to a boil. Add flour and stir vigorously with a wooden spoon until the mixture forms into a ball. 

  • Remove from stove and add one egg and a time, beating until fully incorporated.

  •  Spoon dough onto a greased cookie sheet in circular shapes with the center slightly raised, 1 ½ inches apart. 

  • Bake for 10 minutes at 400 degrees, then continue for 20 minutes at 350 degrees. 

  • Once slightly cooled, cut in half and serve with a scoop of ice cream, drizzled with the sauce.

Making custard for the ice cream

Making custard for the ice cream

Easy peasy puffs!

Easy peasy puffs!


Fava Bean and Ricotta Crostini

There are some perfect produce/dairy pairings in the world that are hard to argue with - tomatoes & mozzarella, beets & goat cheese, corn & butter. I’d like to propose adding fava beans and ricotta to that list - and once you try this recipe, you’ll understand why. As soon as spring arrives, I can’t wait to get my hands on some fresh fava beans. Yes, they take time and patience to prepare but the result is a seasonal delight. This recipe is super simple, so the key is sourcing the best ingredients. Using fresh mint, high quality ricotta, and your favorite crunchy sea salt will elevate this appetizer to the next level.

09BE3566-B0B7-4C43-92D0-E5FC9907570A.jpg

FAVA BEAN AND RICOTTA CROSTINI

Prep time: 30 minutes

Serves: 6

INGREDIENTS:

1 french baguette, sliced

2 pounds fresh fava beans (for 2 cups peeled)

1 cup ricotta cheese

1/4 cup olive oil

1/4 cup butter, melted

1/4 cup mint leaves

2 tbsp honey

1 tbsp lemon juice

1 tbsp lemon zest

Salt and pepper to taste

Flaky Sea Salt (I love this one)

DIRECTIONS

Start by removing the fava beans from their pod by sliding your finger nail along the seam. Open the pod and remove the beans. You can also tear off the end and pull the seam down like a string.

Bring a salted pot of water to a boil and blanch the beans for two minutes. Drain and submerge them in an ice bath to cool. This will preserve their color. Separate the beans from their shells by gently squeezing them and using your thumbnail to pop out the bean. Place beans in a bowl and season with salt, pepper, and lemon juice.

Preheat broiler to high. Arrange sliced baguette on a baking sheet and brush with melted butter. Broil until the edges begin to brown. about one minute.

Build your crostini. Top each baguette slice with a generous portion of ricotta. Drizzle with half of the olive oil and the honey. Spoon the fava beans on top and garnish with mint leave. Drizzle the remaining olive oil on top. Sprinkle with sea salt and lemon zest.

For a more rustic presentation, mix together all ingredients and serve as a dip with the baguette slices, crackers or even radish slices. Enjoy with your favorite white wine!

Start by removing the fava beans from their pods

Start by removing the fava beans from their pods

Blanch the fava beans - first scald in boiling water then plunge into an ice bath

Blanch the fava beans - first scald in boiling water then plunge into an ice bath

Remove the fava beans from their shells

Remove the fava beans from their shells

Top crostini with fava beans, mint, and sea salt

Top crostini with fava beans, mint, and sea salt

Charred Eggplant "Shakshuka"

I had the pleasure of traveling through Israel and Jordan last year and one of the many dishes I fell in love with was, of course, shakshuka. The dish typically consists of eggs poached in a sauce of tomatoes, peppers, onion, and garlic and spiced with cumin, paprika, and cayenne. When I returned home, looking for some of the amazing Middle Eastern flavors I had discovered, I found myself having a remarkable meal at Sofreh, a Persian restaurant in my neighborhood. We had a charred eggplant dish there, topped with a poached egg, that was simply divine. I wondered if I could take the shakshuka concept, lose the peppers and replace them with charred eggplant, and achieve something in-between the Israeli shakshuka and the Persian charred eggplant. The result is this dish. Happy brunching!

IMG_3377.jpeg

CHARRED EGGPLANT “SHAKSHUKA”

Prep time: 1 hour

Serves: 4

INGREDIENTS:

4 large eggs

White vinegar for poaching

1 large eggplant

1 28oz can fire roasted tomatoes, chopped

1 small onion, diced

6 cloves garlic, diced

1 tsp cumin

1 tsp paprika

1 tbsp olive oil

Cayenne and salt to taste

Mint or parsley for garnish

4 tbsp labne, optional for garnish

DIRECTIONS

Prepare your stovetop by placing tin foil around one burner. Using a fork, poke holes in the eggplant and then place on burner over medium heat. Let cook for 30 - 60 minutes, depending on the size of the eggplant, turning and moving with tongs so that it’s evenly charred. Remove from heat and let cool to the touch. Peel the charred skin and then rough chop the eggplant.

Heat olive oil in a large skillet over medium high heat. Add garlic and onions and cook until translucent. Add chopped tomatoes and eggplant and season with cumin, paprika, cayenne and salt to taste.

While sauce simmers, poach your eggs. I use a sous vide machine set to 167.5 for 13 minutes, but find a simple method here. Season poached egg with salt and pepper.

Serve charred eggplant “shaksuka” in a bowl with poached egg and fresh herbs on top. A dollop of labne is also delicious!

Don’t forget to punch holes in the eggplant before you start the charring process.

Don’t forget to punch holes in the eggplant before you start the charring process.

Use tongs to turn the eggplant over the open flame.

Use tongs to turn the eggplant over the open flame.

Time to peel!

Time to peel!

Sauté your onions and garlic.

Sauté your onions and garlic.

Add roasted tomatoes and….

Add roasted tomatoes and….

Charred eggplant.  Simmer while you poach your eggs.

Charred eggplant. Simmer while you poach your eggs.

Top with fresh herbs and poached egg. A dollop of labne is delicious as well. Happy brunching!

Top with fresh herbs and poached egg. A dollop of labne is delicious as well. Happy brunching!

Spaghetti Carbonara

My desire to put together the perfect carbonara recipe came from a meal I had in Rome, way back in 2003. When I tried to order the same dish at restaurants in NYC, I just couldn’t find anything that came close. Most places used cream. Some added peas - the horror! Where was the simple, rustic dish that I fell in love with in Italy? So naturally, I decided to learn to make it myself. All these years later, it’s by far my most requested meal. Birthdays? Potlucks? “Please make carbonara.” The surprising thing is, it’s also the simplest! It can be thrown together on a whim with ingredients you likely already have on hand - spaghetti, cheese, eggs, butter, and in a pinch, bacon instead of pancetta. Because it’s so simple, the quality of your ingredients will affect the outcome of the dish. However, you’ll wind up with a satisfyingly simple supper - or brunch - either way. After all, it’s basically pasta with bacon and eggs!

IMG_4944.jpg

SPAGHETTI CARBONARA

Prep time: 20 minutes

Serves: 4 - 6

INGREDIENTS:

1 lb spaghetti

4 large eggs

8 oz parmesan cheese

1 stick butter, room temp, cubed

1 lb pancetta, 1/4” dice (or 8 oz prepackaged pancetta or bacon)

4 cloves garlic

Coursely ground black pepper

Salt

IMG_4868.jpg

DIRECTIONS:

Fill a large pot with water and salt “to the salinity of the sea.” What does that mean exactly? A fantastic guide can be found here. Bring to a boil.

While water is boiling, add cubed pancetta and whole garlic cloves to a large skillet over medium high heat. Cook until the fat renders and the pancetta becomes slightly crispy. Drain on a paper towel, and remove garlic cloves. (Tip: Use the garlic to make a side of garlic bread or garlic butter.)

Whisk to combine eggs, butter, and cheese in a large serving bowl.

Add pasta to the boiling water and cook until al dente.

When the pasta is cooked, quickly strain and IMMEDIATELY transfer to the serving dish. With the right speed, you’ll retain some of the cooking liquid, so there’s no need to reserve any. Toss the pasta with the sauce until completely coated. This will “cook” the eggs. Stir in the cooked pancetta.

Top with plenty of freshly group black pepper and serve immediately.

NOTE: Pancetta purchased from a butcher generally will contain more fat that will render - hence the discrepancy in the amounts needed. I’ve also prepared this recipe numerous times with both dried and fresh pasta, and I personally prefer the way that al dente dried pasta stands up to this particular sauce. But to each their own!

Salt to “the salinity of the sea” - this is the only chance you have season your pasta.

Salt to “the salinity of the sea” - this is the only chance you have season your pasta.

Cook your pancetta or bacon just until crispy.

Cook your pancetta or bacon just until crispy.

Don’t forget to remove those garlic cloves - smash them and use them to make garlic bread!

Don’t forget to remove those garlic cloves - smash them and use them to make garlic bread!

I always use organic eggs and butter, and high quality parmesan cheese.

I always use organic eggs and butter, and high quality parmesan cheese.

Make sure your butter is at room temp before you whisk!

Make sure your butter is at room temp before you whisk!

Feels like brunch!

Feels like brunch!

Your sauce is ready in a snap.

Your sauce is ready in a snap.

I prefer dried pasta cooked al dente for this particular recipe.

I prefer dried pasta cooked al dente for this particular recipe.

Act fast - the hot pasta will “cook” your sauce - it’s ok if a little cooking liquid spills over as well.

Act fast - the hot pasta will “cook” your sauce - it’s ok if a little cooking liquid spills over as well.

Mmmm, there’s that creaminess. But NO CREAM.

Mmmm, there’s that creaminess. But NO CREAM.

Add your “bacon” to your “eggs” - because they belong together.

Add your “bacon” to your “eggs” - because they belong together.

Serve with a nice fresh salad to break up that delicious creaminess! Buon Appetito!

Serve with a nice fresh salad to break up that delicious creaminess! Buon Appetito!


Chicken Tortilla Soup

When I started working on a Latin-inspired menu to complement the sounds of Son de Yuma this February, I knew I wanted to include a warm, comforting bowl of soup. Sopa de tortilla seemed like the perfect fit, but it wasn’t exactly in my repertoire. I still make my mom’s chicken soup when I’m feeling sick, and I can throw together a mean chili for football Sunday. So I took a little inspiration from each, mixed it all together with some freshly fried corn tortillas, and this soup is the result! The version below is simplified for weeknight dinners using pantry items like chicken stock and canned tomatoes. Seasonings can easily be adjusted to your desired heat level. Buen provecho!

IMG_0379.jpg

CHICKEN TORTILLA SOUP

Prep time: 10 minutes

Cook time: 50 minutes

Serves: 4

INGREDIENTS:

2 boneless chicken breasts

4 tortillas (1 sliced in strips)

6 tbsp canola oil

1 box chicken stock

½ yellow onion, diced

2 cloves garlic, diced

1 chipotle pepper in adobo, diced

1 can crushed fire roasted tomatoes

1 tbsp chili powder

1 ½ tsp cumin

1 tsp paprika 

½ tsp cayenne

¼ tsp coriander 

2 bay leaves

Salt & black pepper, to taste

Garnish:

Lime

Cilantro

Cotija, crumbled

DIRECTIONS:

Season chicken breasts with salt and pepper and place in a medium pot. Cover completely with chicken stock and bring to boil.  Cover pot and simmer until the chicken is cooked through, about ten minutes. Remove the chicken from the liquid and let cool slightly before shredding.  

Heat canola oil in a heavy pot over medium-high to 350 degrees. Using tongs, fry each tortilla individually until they turn pale golden. Remove from oil and drain on paper towels, then repeat the process with the tortilla strips. 

In the same cooking oil, sauté onions and garlic until translucent, then add chili, tomatoes, chili powder, cumin, paprika, cayenne, coriander, and salt.  Simmer and stir, for 5 minutes.  Remove from heat. 

Working in batches using a food processor, puree tomato mixture with the whole fried tortillas and return to pot. 

Add the shredded chicken, bay leaves, and chicken stock until desired consistency is reached. Season with salt to taste. Simmer uncovered, for 30 minutes.

Remove bay leaves serve with fried tortilla strips, lime wedges, cotija, and cilantro. 

Truth told, you may wanna cut a few extra tortillas into strips and fry them too. Brunch prep was a “fry one, eat one” situation.

Truth told, you may wanna cut a few extra tortillas into strips and fry them too. Brunch prep was a “fry one, eat one” situation.

Add a squeeze of lime, cilantro and cotija, and what you have is mmm, mmm good!

Add a squeeze of lime, cilantro and cotija, and what you have is mmm, mmm good!

The Ultimate Snackadium

Super Bowl Sunday is kinda like my Christmas. It’s also a great excuse to throw a party. I built my first snackadium back for a Super Bowl Party in 2009, when these creations were just creeping up in the corners of the internet. Today, thanks to social media, a simple google search will show you unlimited possibilities - double-decker sandwich snackadiums, deli meat snackadiums, even dessert snackadiums. These instructions are just a jumping off point for building your own. I do recommend enlisting a friend so that you don’t get yourself into a sticky situation with the adhesive contact paper. Please share your creations with us…and may the best team win!

012720_Snackadium_v4 Copy 01.00_02_01_10.Still016.jpg

FOOTBALL FIELD DIP

YOU'LL NEED: 

20x12 inch aluminum pan 

6 16oz containers of sour cream (reserve 1 cup) 

6 8oz packages of cream cheese 

3 packets taco seasoning 

2 16 oz jars of salsa 

3 8oz bags of Shredded Mexican Cheese 

1 head iceberg lettuce, chopped 

11 olive slices 

11 jalapeno slices 

2 slim jim snack sticks, halved 

2 wooden skewers 

Piping bag or container (ziploc will work in a pinch!) 

DIRECTIONS:

1. Combine sour cream, cream cheese, and taco seasoning in pan.  Mix well. 

2. Spread salsa over two thirds of the dip, left to right. Spread cheese over two thirds of the dip, right to left. Spread lettuce over enter pan. 

3. Form the end zone on your left with cheese and your right with salsa. 

4. Put reserved sour cream in a ziploc bag and cut the tip. Pipe lines on your dip "field" and decorate.

5. Position olives and jalepeno slices as your players. 

6. Insert wooden skewer into a Slim Jim half.  Cut skewer leaving a half inch at top. Affix other half of Slim Jim to the top and bend to form a goal post. Insert into dip. Repeat for the other side. 

012720_Snackadium_v4 Copy 01.00_01_28_04.Still008.jpg
012720_Snackadium_v4 Copy 01.00_01_35_06.Still004.jpg
012720_Snackadium_v4 Copy 01.00_01_36_18.Still006.jpg

SNACKADIUM

YOU'LL NEED: 

10 Bankers Box Magazine Organizers 6-inch (trim tops 3 inches) 

1 roll Aluminum Foil 6-ft roll Adhesive White Vinyl 

12 2-liter soda bottles 

14 of your favorite snacks!

1 chalkboard paper adhesive sheet

1 chalk marker

Toy cars

DIRECTIONS:

1. Position football field dip in the center of your table, surround with bankers boxes - 3 on each side and 2 on each end. 

2. Use 3 soda bottles and aluminum foil to create each rounded "corner" of your stadium. 

3. Cut adhesive vinyle to the height of the boxes and wrap structure to form your "stadium". 

4. Fill each of the 14 "sections" with your favorite snack!

5. Create your "parking lot” by drawing parking spaces with your chalk marker on the adhesive chalkboard paper - place outside of stadium and fill with toy cars!

IMG_4128.jpg

Mushroom & Gruyere Quiche

I love this recipe for entertaining because so much of it can be prepped in advance. If you’re making your own quiche crust you’ll wanna start the night before (or even a week or two before - the crust can be prepared and then frozen!) But you can always start with a store-bought pie crust to save time - just make sure to blind bake it before filling. While the mushroom and gruyere filling is great for vegetarians, you could add bacon to this recipe - or skip the mushrooms altogether and use leftover holiday ham! That’s the beauty of quiche for me. The possibilities are endless!

IMG_0365.JPG

MUSHROOM GRUYERE QUICHE 

Prep time: 1 hour 

Bake time: 1 ⅕ hours 

Serves: 8 

INGREDIENTS:

1 pound oyster mushrooms, stems trimmed and large caps halved or quartered

1 pound white mushrooms, cleaned and thinly sliced

2 tablespoon unsalted butter

2 small shallots, minced

1 tablespoon thyme, chopped

1 cup Gruyere, grated 

1 cup milk

2 cup heavy cream

8 large eggs, lightly beaten

Salt and pepper to taste 

Freshly grated nutmeg

Homemade quiche crust OR store-bought pie crust 

DIRECTIONS:

 Prepare quiche crust according to directions below. If using store-bought crust, remember to blind bake it according to package instructions. When using an uncooked filling like custard, you want to make sure your crust is blind baked so it doesn’t get soggy! 

Preheat oven to 350. Heat butter in large skillet on medium. Add mushrooms and saute until they start to soften, about 5 minutes. Add shallots and thyme and season with salt and pepper. Continue to cook until the mushrooms are tender, about 12 minutes, stirring often. Set aside. 

Mix eggs, heavy cream, milk, salt (about a tsp), a large pinch of pepper, and a pinch of nutmeg in the bowl of a stand mixer on high until the custard mixture is frothy.  

Fill your blind baked shell with a layer of ⅓ of the gruyere and ½ of the mushroom mixture. Pour ½ of the egg mixture into the shell. Make another layer of ⅓ cheese, remaining mushrooms, and then the remaining egg mixture. Scatter last ⅓ cheese on top. Bake 1 ½ hours until the quiche is brown on top but still jiggly in the center. Let cool and set. If you made your own crust, cut the crust flush with the top of the pan and gently unclasp and remove the springform pan. Serve warm. 


QUICHE CRUST INGREDIENTS:

2 cups all-purpose flour, plus more for dusting

1 teaspoon kosher salt

2 sticks chilled unsalted butter, diced

1/4 cup cold water

Canola oil, for brushing


DIRECTIONS:

Start with 1 cup of your flour and your salt in the bowl of a stand mixer. Using the paddle attachment on low speed, gradually add the butter a few pieces at a time. Increase the speed to medium and mix until the butter is completely incorporated.  Then reduce speed and add the remaining 1 cup of flour and water until incorporated. Remove the dough from the bowl, flatten, wrap in plastic and refrigerate overnight.  

Brush the inside of a deep 9-inch springform pan with canola oil and set it on a baking sheet. Lightly flour your work surface and both sides of your dough and roll out the pastry to a 16-inch round.  Place the round into the ring, pressing it down into the pan. The dough should hang over the edge. Trim the overhang to 1 inch and press it against the outside of the ring. Use the trimmed dough to patch up any cracks - you don’t want your quiche custard leaking through later! Reserve the rest of the excess dough. Refrigerate crust for 30 minutes and preheat oven to 400.  

Before baking, line crust with parchment paper and fill with pie weights. No pie weights?  Dried beans work in a pinch! These weights will prevent the crust from bubbling up or shrinking. Bake for about 30 minutes or until sides are lightly browned. Then remove weights and parchment and continue baking for 12-15 minutes, or until the center of the crust browns. If crust has cracked, patch it up any remaining reserved dough. (This crust can also be prepared a day in advance, covered in plastic and left at room temp overnight. You can also freeze it for up to one month.)


i still don’t own a rolling pin but I picked up this trick from Mark Iacono at Lucali and it works beautifully!

i still don’t own a rolling pin but I picked up this trick from Mark Iacono at Lucali and it works beautifully!

IMG_1574.JPG
IMG_7862.JPG


Fall Punch

I love this recipe for large groups because its refreshing fall flavors are perfect with or without booze. By serving the punch with a bottle of dark rum on the side, you put your guests in control. It also looks extra pretty served with some sliced oranges with cinnamon and cloves on top!

IMG_9938.jpg

FALL PUNCH

Makes approx 40 8oz pours

INGREDIENTS

3 64oz bottles of Apple Cider

1 carton orange juice

1 2-liter bottle Ginger Ale 

Ground Cinnamon to taste

Ground Nutmeg to taste

1 orange, sliced

5 cinnamon sticks

Approx 30 cloves

Optional: Orange segments and cinnamon sticks for serving

DIRECTIONS

In a 2.5 gallon beverage dispenser or larger, combine cider, OJ, ginger ale, cinnamon and nutmeg. Mix well. Press cloves and cinnamon into the orange slices and float on top of punch. Serve as is, over ice, or with a splash of dark rum. Optional garnish with orange segments, orange peel, and/or cinnamon stick.

I love these Burlap and Barrel Pemba Cloves!

I love these Burlap and Barrel Pemba Cloves!

Make a sliced “pomander” of sorts.

Make a sliced “pomander” of sorts.

IMG_9927.jpg

Enjoy over ice or with dark rum… don’t forget your garnish!

Apple Cider Donut Bread Pudding

As soon as fall is in the air and apple cider donuts start popping up in farm markets, I’ve gotta start making this recipe. At brunch club we serve it warm, topped with homemade maple ice cream, toasted walnuts, bourbon whipped cream, and a touch of cinnamon. It’s also delicious on its own the next day with a hot cup of coffee! I recommend buying donuts a few days in advance - stale donuts work better than fresh in this case. (I also recommend buying more than 18 donuts. I can never resist the urge to snack while I’m making this!)

IMG_7978.jpg

APPLE CIDER DONUT BREAD PUDDING

Prep time: 1 hour

Serves: 12-16

INGREDIENTS

18 apple cider donuts

1 stick butter, cubed  

1 cup sugar

5 large eggs

2 cups heavy cream

1.5 tsp cinnamon

1 tsp nutmeg

1 tsp pure vanilla extract

 DIRECTIONS

Preheat oven to 350 degrees. Using a stand mixer with a paddle attachment, cream butter and sugar until it forms a ball. In a separate bowl, lightly beat eggs with heavy cream, cinnamon, nutmeg, and vanilla. Add this mixture to the butter and sugar and beat until its combined and becomes slightly foamy. Butter an 8x11 baking dish and crumble the donuts into small pieces. Pour the custard mixture over the donuts and mix until evenly combined. Using your hands is recommended! Let the donuts soak for 10 minutes, then bake at 350 for 40 minutes or until the top is slightly browned. Let cool slightly and serve warm with your favorite toppings. Bread pudding can be made in advance, refrigerated, and reheated. Also freezes and reheats well.

Cream your butter and sugar.

Cream your butter and sugar.

Crumble your donuts.

Crumble your donuts.

Pour your custard over your donuts.

Pour your custard over your donuts.

Mix it all up! Use your hands!

Mix it all up! Use your hands!

Enjoy!

Enjoy!